
Six cheap motorcycle tricks learned from experienced riders
by Andy Greaser courtesy Revzilla
In my time riding and wrenching, I've picked up some tips and tricks from old-school, skinflint riders who found their own solutions to common problems and annoyances. Here are six of my favorites that will work on almost any motorcycle. Even better, each of these small upgrades should cost five bucks or less to install. I still recommend an SAE harness with USB charging adapter as the first mod for any motorcycle, but after you’ve completed that, give these a try.
Velcro a sidestand puck under your seat
Ever have a motorcycle tip over because the sidestand was resting on soft earth or melted asphalt? Sidestand pucks are cheap and handy for keeping your bike upright. Lots of motorcycles, especially newer ones, lack storage space, and I hate riding with stuff in my pockets. Here’s an easy solution that might just save you from buying a new tank, side cover, or handlebar after a tipover.
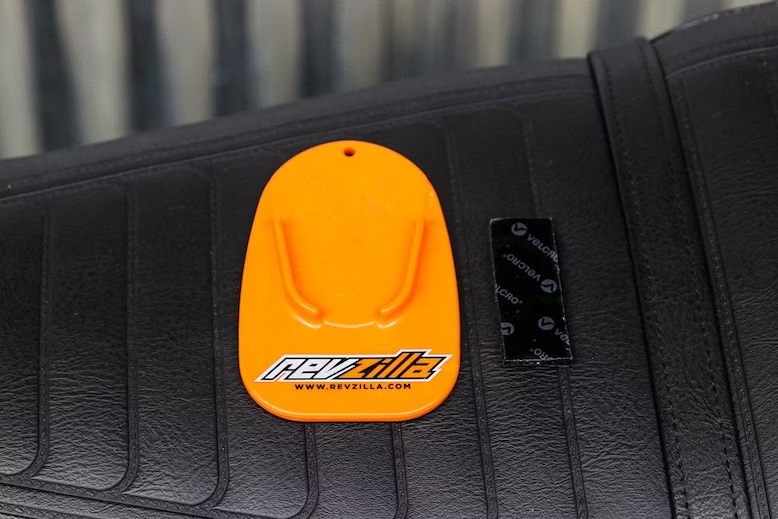
Use the heavy-duty adhesive type if you can find it. Photo by Andy Greaser.
Just about anything small and flat will work for a sidestand puck: a crushed can, a 50-cent electrical box plate, a piece of hardwood, a lid from a quart-size paint can, whatever. You can also use a real side stand puck, often given out at moto events, or buy a bright orange one that’s hard to miss when pulling away from a stop. Grab a strip of adhesive hook-and-loop (Velcro) and put the stiffer piece on your side stand puck.
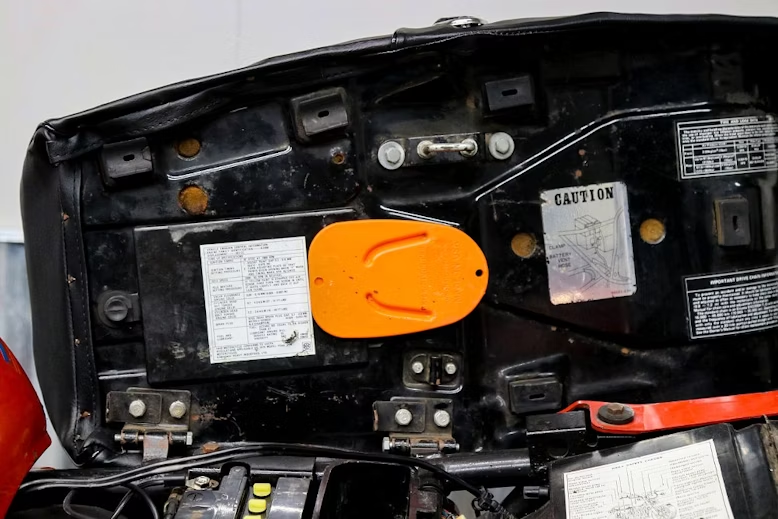
You might have to try a few different locations before finding one that fits. The seat should close without any extra effort. Photo by Andy Greaser.
Find a suitable location under your seat to stick the fuzzy side, making sure that the seat locks into place with the puck attached. This might take some trial and error, but once you have a good spot, you can stow a handy puck for dicey parking situations. Old timers who hate bending down will sometimes add a string long enough to reach the handlebar for easy retrieval.
Valve stem removal cap
Here’s a trick I picked up from a graybeard in the bicycle world. Swap your standard plastic valve stem cap for a metal one with a built-in valve core removal tool. You can find these at auto parts stores, bicycle shops, or countless retailers online for around $2 each. There are also plastic versions of this tool that are easier to thread off the stem, but barely strong enough for one core removal.
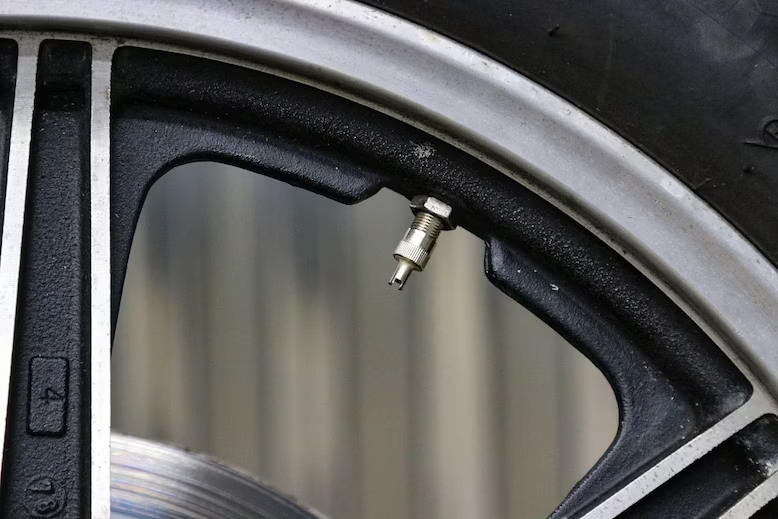
Simple and cost-effective. I can't remember the last time I used a dedicated valve stem removal tool instead of one of these. Photo by Andy Greaser.
I put these on all my motorcycles with tubed tires, especially dirt bikes, so I can easily remove cores for roadside or trailside tire changes. They’re also handy for airing down tires when needed, although your tire pressure gauge should have a small nub for that, too.
Bonus tip: Are the valve stems on your tubeless wheel hard to access? Pick up a small right-angle valve stem extender so that bulky gas station air chuck can actually air up your bike’s tires.
The “trouble kit” that can hide anywhere
A grizzled ADV rider showed me this cheap, lightweight, and compact “trouble kit” that you can assemble for less than $5. It can be mounted just about anywhere and works well for bikes that might lose a few parts or run out of gas on any given ride, including ADV bikes, dual-sports, dirt bikes, vintage motorcycles, and so on. Here’s how to make a trouble kit of your own.

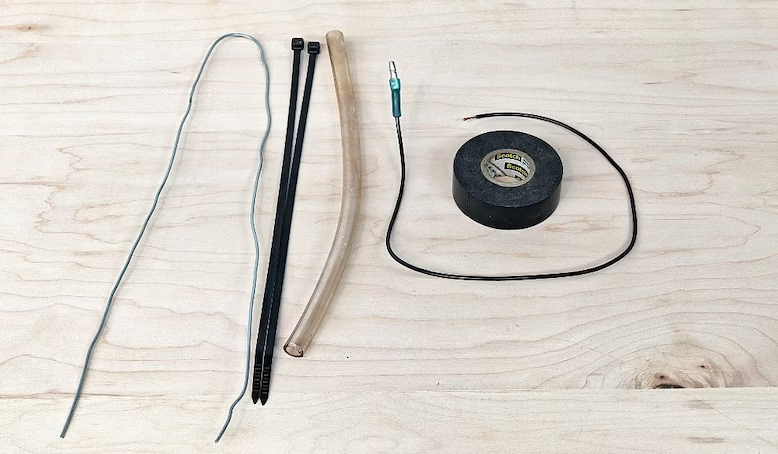
ou probably have most of this stuff lying around the house already. Photo by Andy Greaser.
Get a length of hose, at least a foot long. You’ll also need some stiff wire (a coat hanger will do), a couple zip ties, some insulated electrical wire with stripped ends, and electrical tape. Fold the stiff wire in half and stuff it into the hose along with the zip ties and electrical wire. Wrap the electrical tape around one end to make a mini spool. Presto, trouble kit.
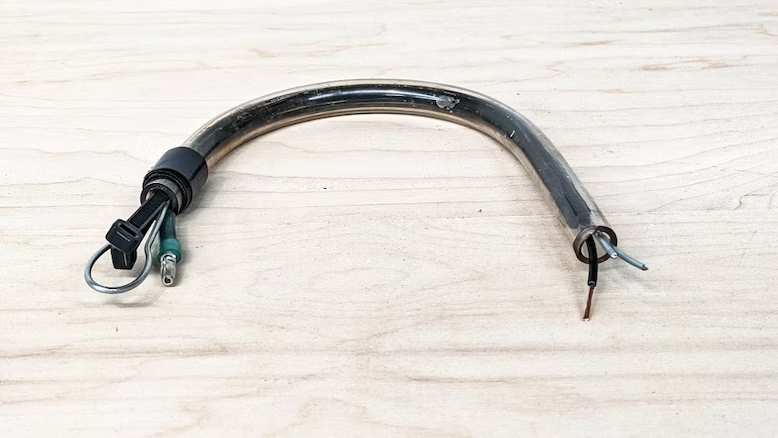
Here's the final product. Tuck one under the seat, inside your saddlebags, or in a backpack pocket. Photo by Andy Greaser.
The wire helps the hose hold its shape to tuck anywhere on your motorcycle, Secure it as needed with more tape. Lots of motorcycle problems can be solved with wire, zip ties, some hose, and a little tape, and this compact package doesn’t take up much room at all.
O-ring fork travel indicator
If you buy a newer motorcycle with a fancy fork, it’ll probably include a rubber ring that indicates fork travel. This helps the rider make critical decisions with suspension adjustments, like setting sag. Older motorcycles or budget models with right-side-up forks don’t include these, but you can add your own for pennies. (You can also add an O-ring travel indicator to an inverted fork. More disassembly work is involved, so it might be best to add the O-ring when disassembling the fork for a full rebuild.)
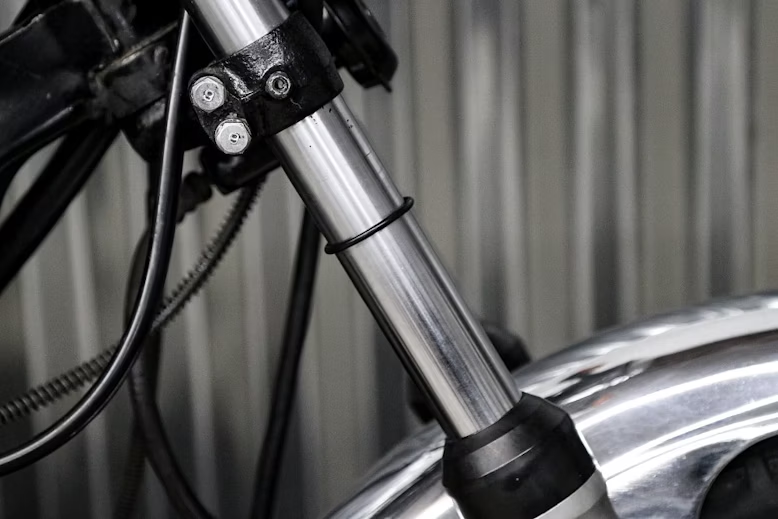
So what if your motorcycle doesn't have the latest Öhlins or WP hardware? Anyone can benefit from a travel indicator for suspension tuning. Photo by Andy Greaser.
Next time you have your front wheel off, loosen the triple clamp bolts for one of the fork legs, and remove any brake/fender hardware to slide the leg out of the bike. Find a nitrile O-ring that is just a tad smaller than the fork diameter. It should slide easily up and down the fork without losing its position. A fatter O-ring is better than a skinny one. Slip it on and push it down to the fork seal. Reinstall the fork leg, re-torquing all relevant fasteners, and enjoy your new fork travel indicator.
I love zip ties as much as the next guy, but avoid the temptation to slap one on instead of disassembling the fork. Zip ties can collect debris and scratch up the fork stanchions.
“They call me baby driver”
Does your motorcycle have fasteners or screws you often need to access? Maybe Torx cover bolts or carb adjustments in tight spaces? You can make a miniature screwdriver with spare hardware that fits in a pocket or tool kit.
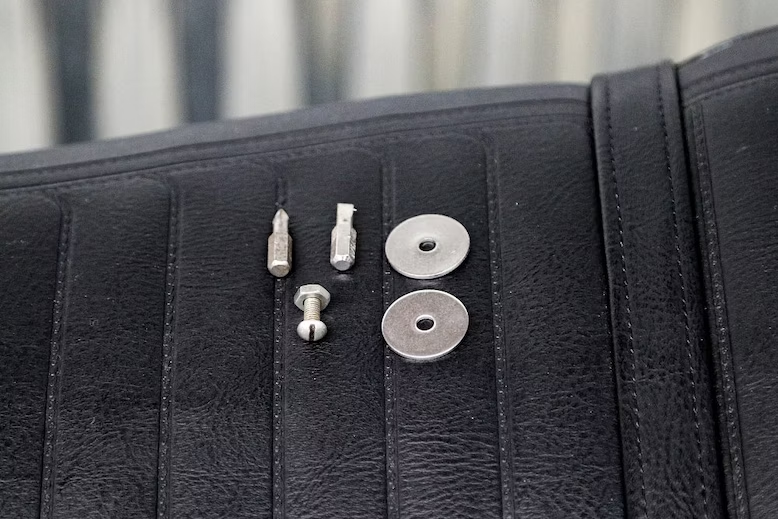
Two bits, two washers, a bolt, and a nut are all you'll need. Photo by Andy Greaser.
Find a nut, a bolt, two fender washers, and the necessary bits. The nut and bolt clamp the bits between the washers to create a low-buck mini driver. Push the bits inside and tighten for storage.

Ready for action. Photo by Andy Greaser.
Hacking the terminal
When you buy a new conventional battery for your motorcycle, it will usually include some fiddly fasteners and a length of drain hose. Getting the terminal nuts to stay in place while tightening the bolts can be a pain, but the solution is right there in the box.
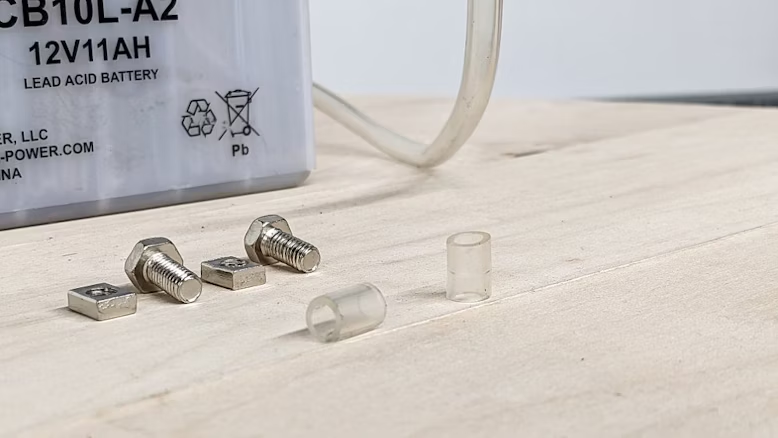
The drain hose pieces should be small, like this. Photo by Andy Greaser.
Cut two short pieces of drain hose off, half an inch long at most, and push them into the battery’s terminals. Then, slide the nuts in above the hose sections. The hose will press the nuts in place so that they don’t move out of position when tightening the bolts. Just make sure that the hose isn’t preventing the bolts from fully tightening, and you’re good to go.
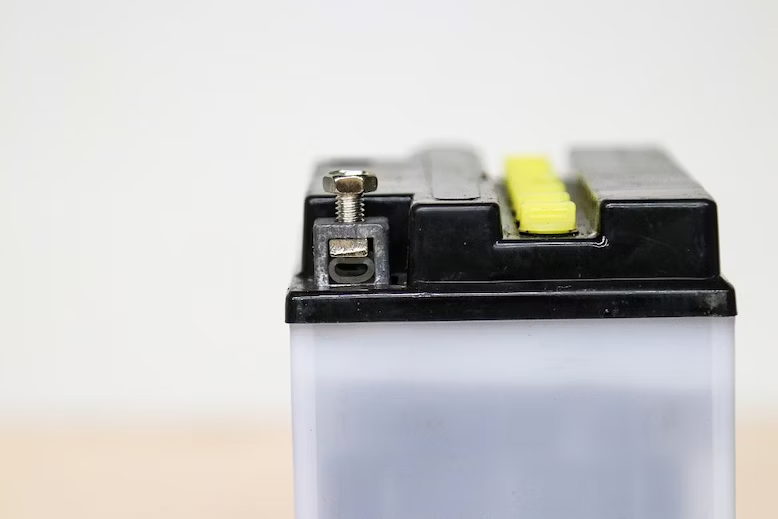
See the little piece of hose holding the terminal nut in place? Photo by Andy Greaser.
That's all I have for today. If you've learned any tricks from old-timers, I want to hear about them. You don't need to spend a pile of money to improve your life on two wheels.
by Andy Greaser courtesy Revzilla